
The Ultimate Guide to Repairing a Peeling Leather Couch
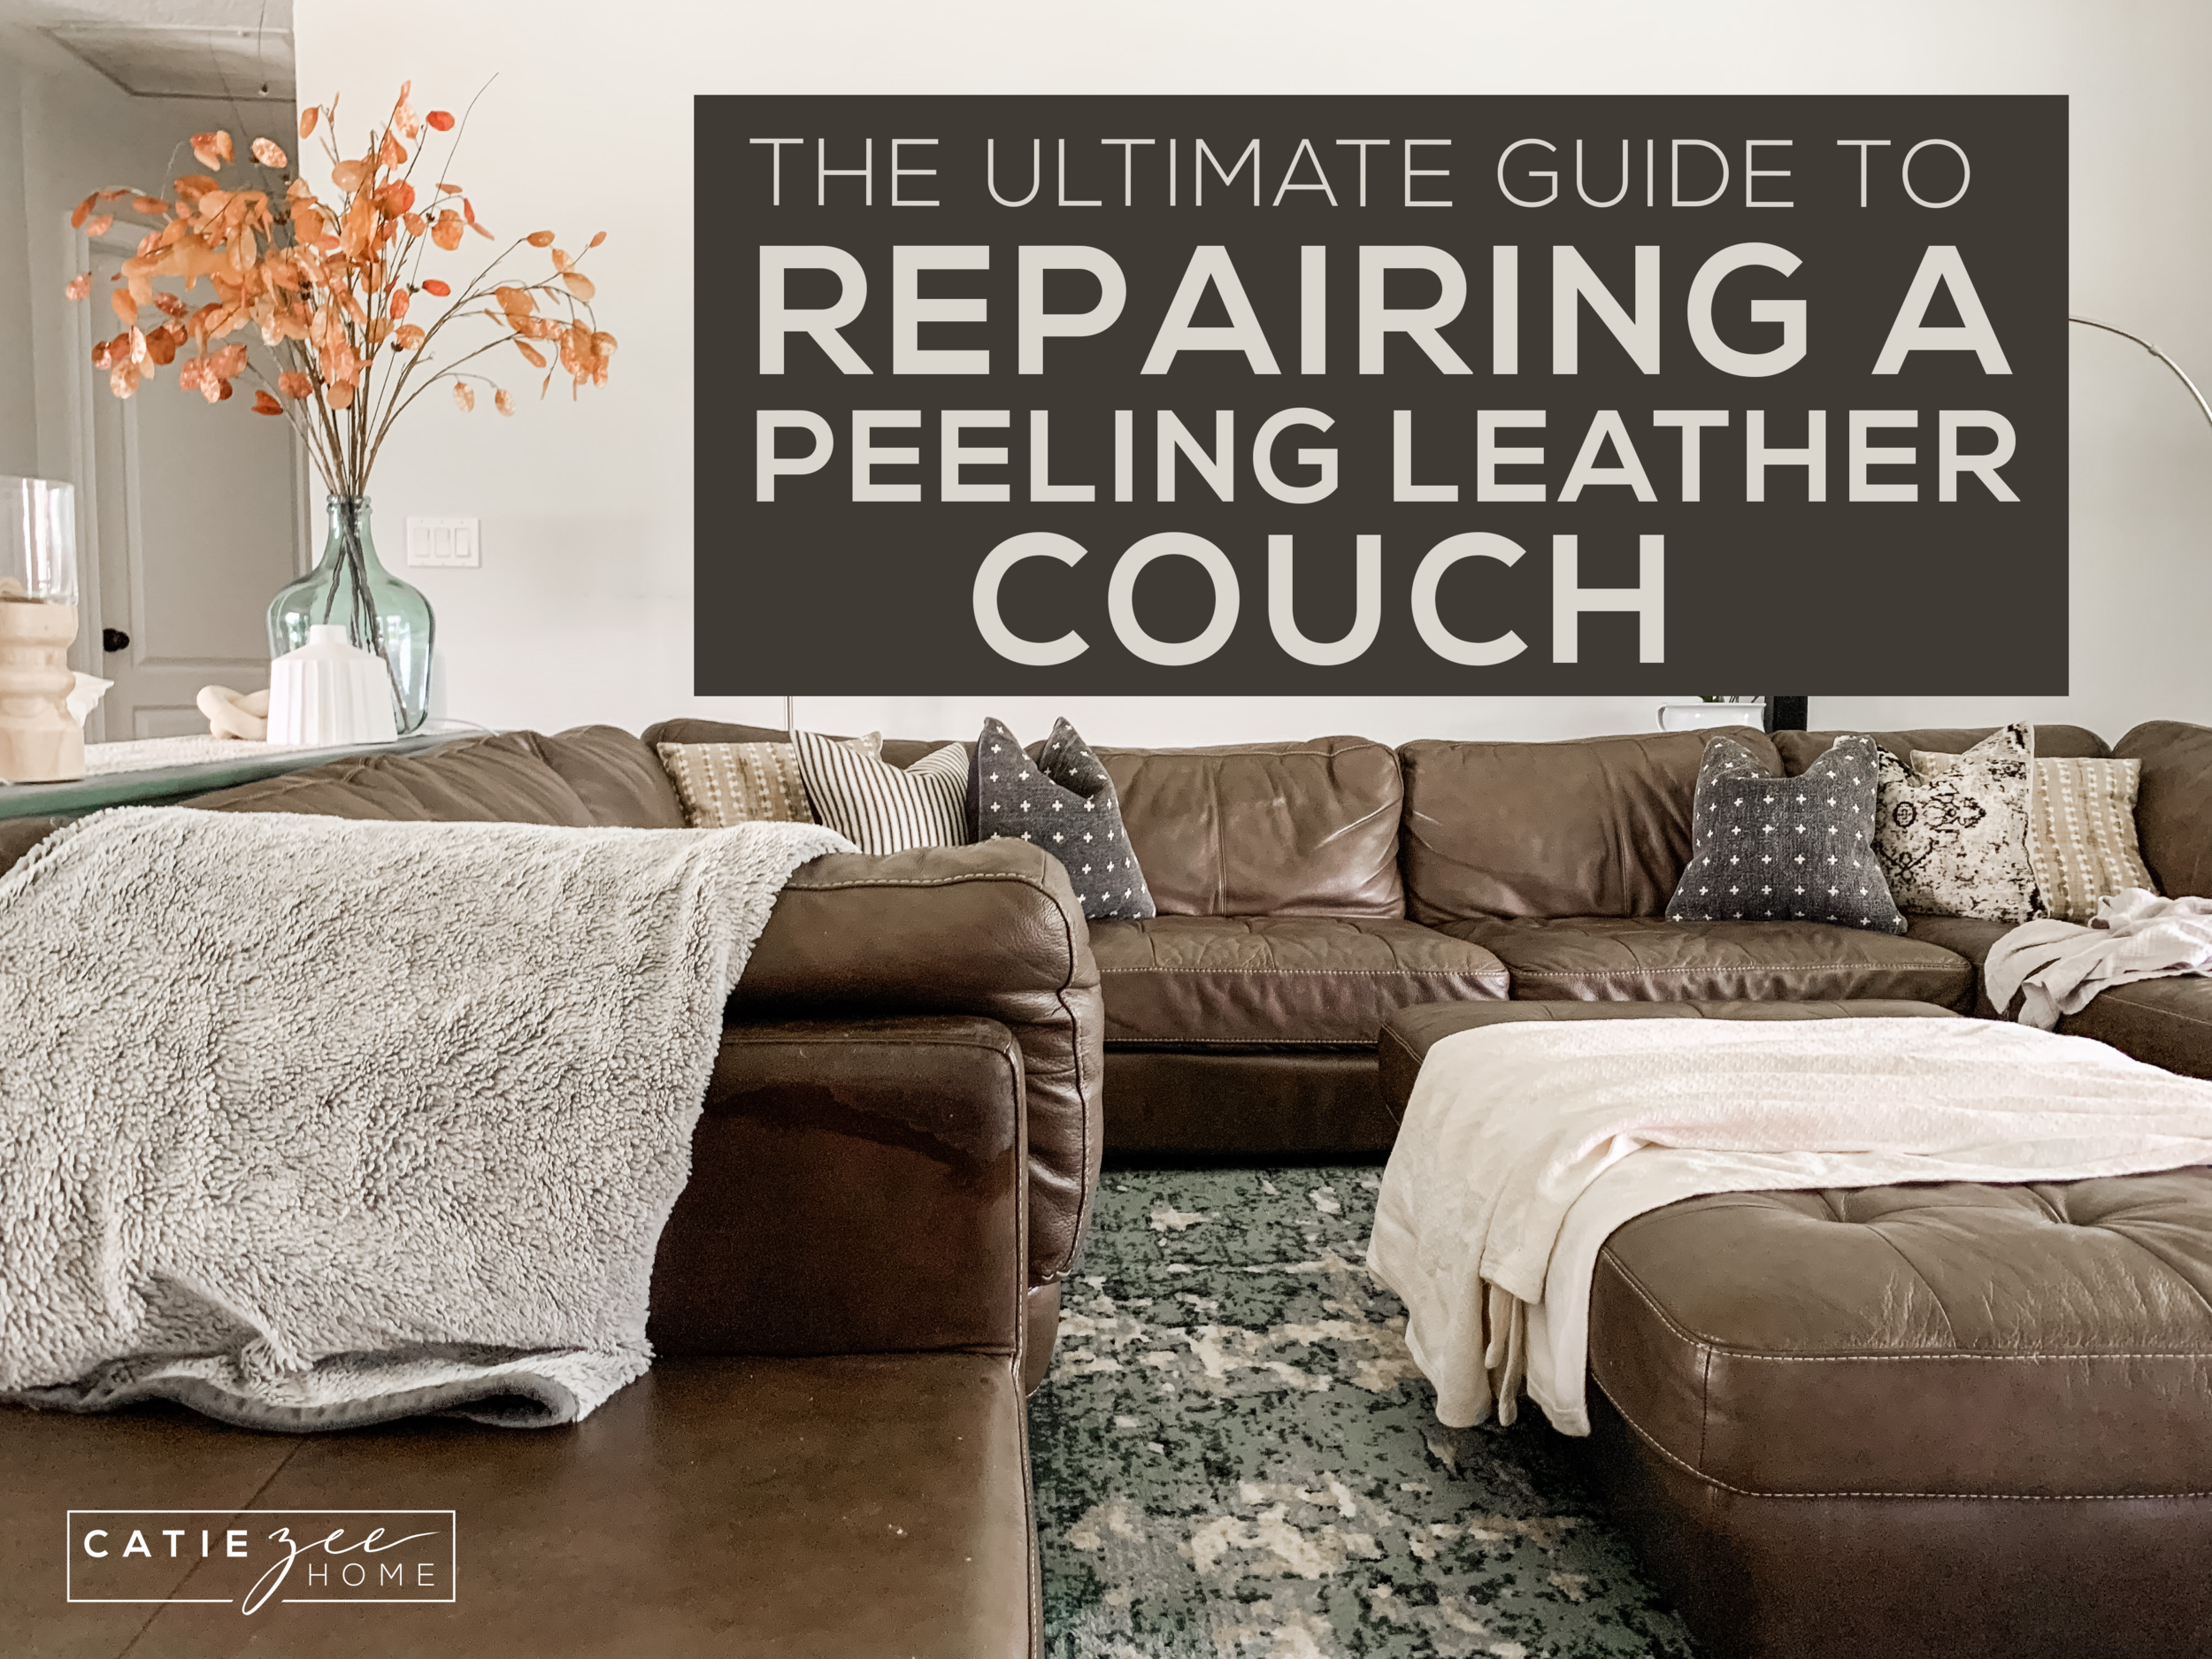
We bought our couch about 7 years ago for a whopping $3,000. I know… it was a splurge, but I will always recommend splurging on the pieces you will use every single day. I’ve spent hours nursing our babies on that couch while binge watching numerous Netflix series, it has acted as a make-shift bed for company (it’s surprisingly comfortable), and every night we all snuggle up together and read bedtime stories with our children. We have never regretted our investment - but one day, I noticed small brown bits attached to our sons foot. I quickly realized it was coming from the sides of the cushions of our couch (which we realized are bonded leather, not italian leather like the most visible parts)!
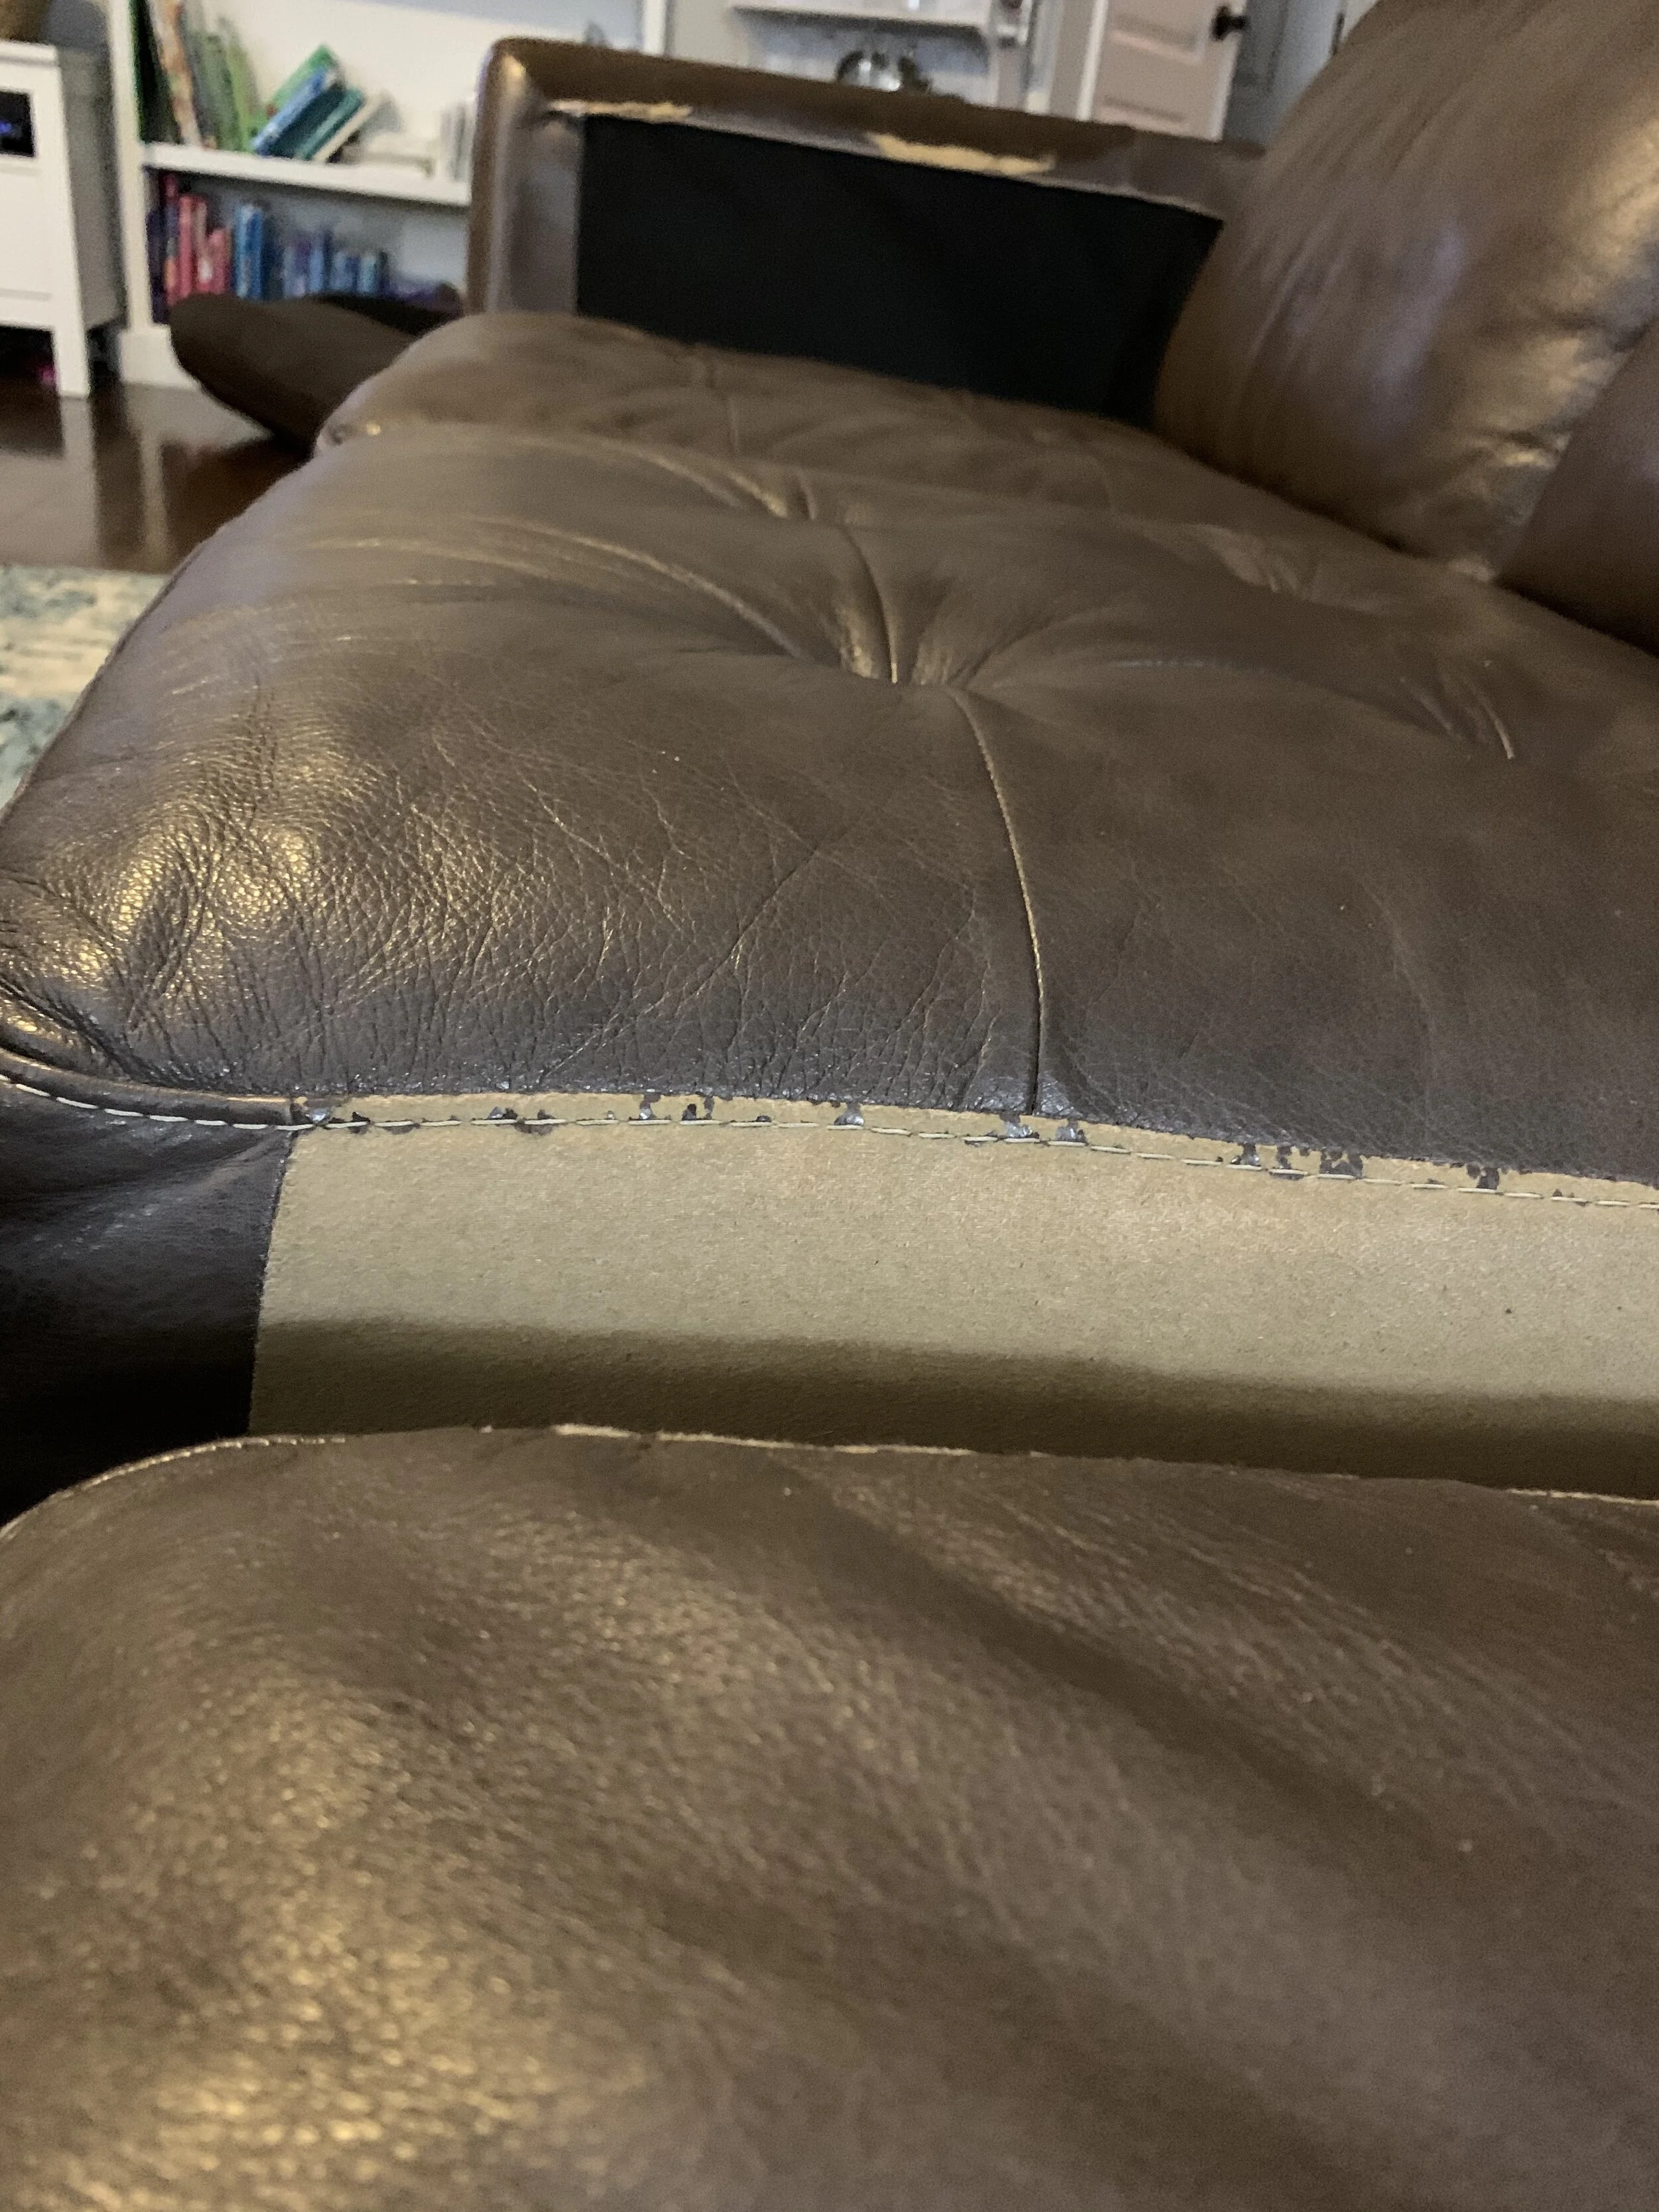
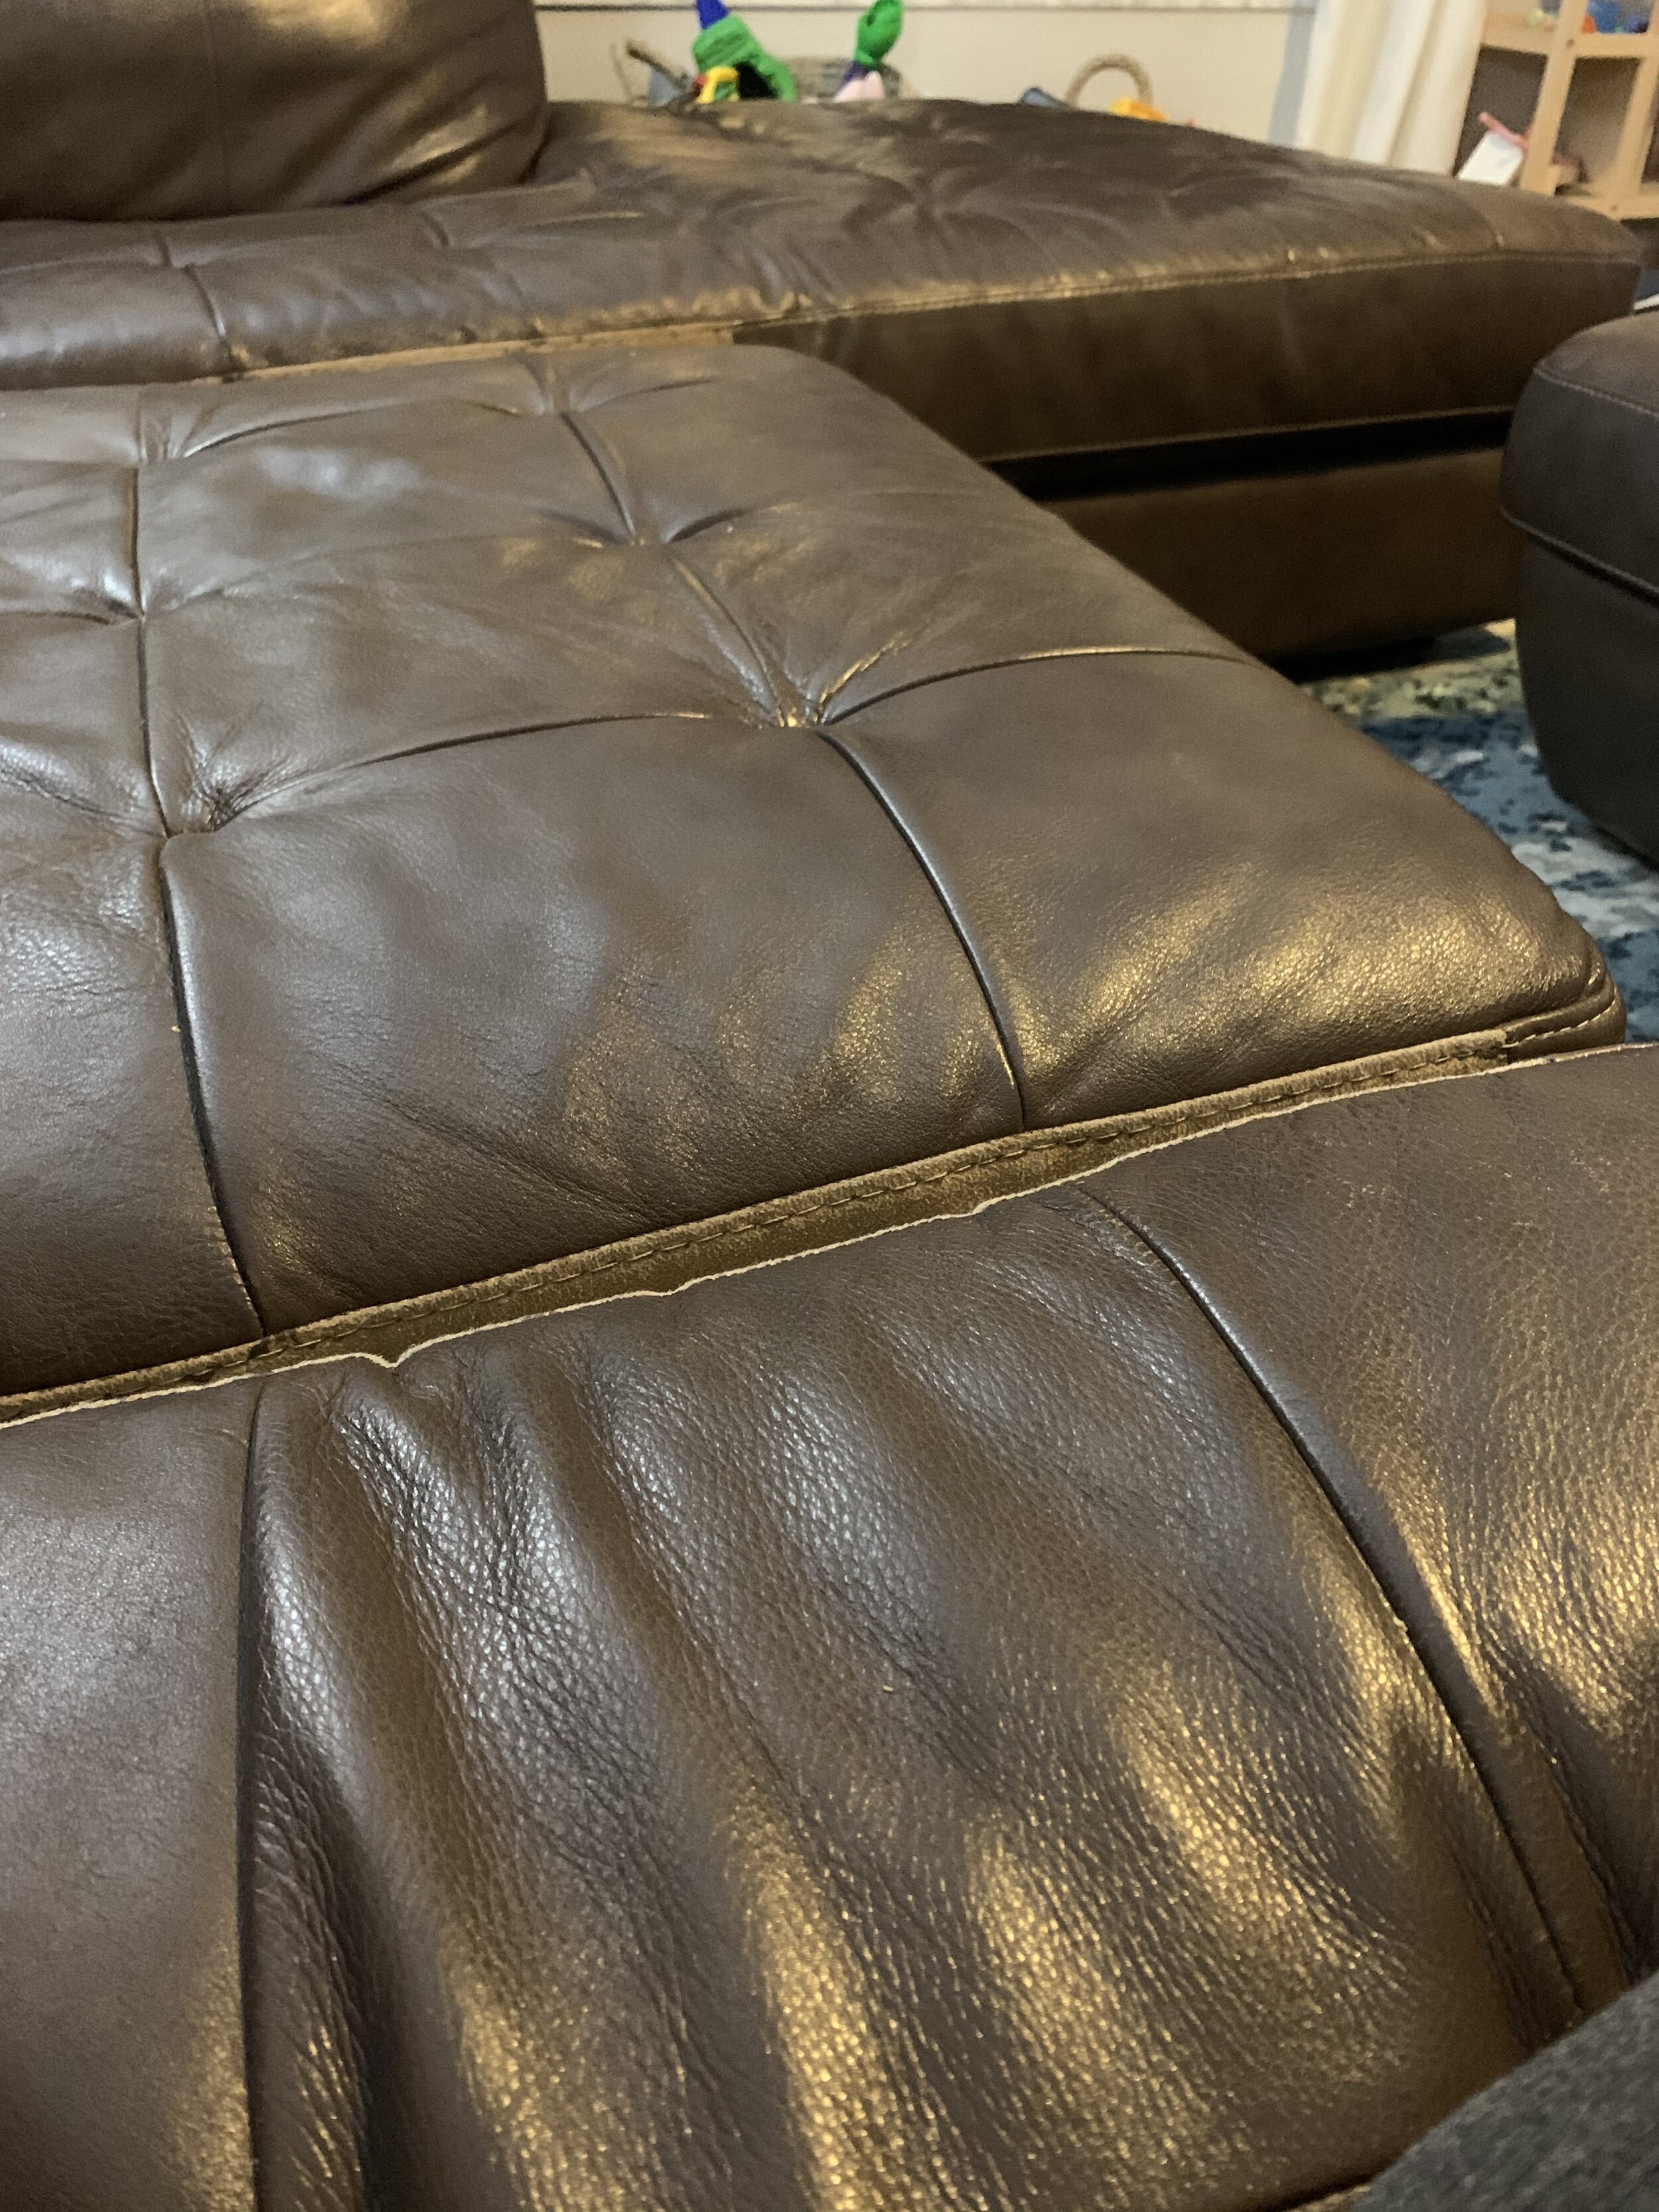
I started to mourn the inevitable loss of our giant U-Shaped snuggle station. I knew I couldn’t live with its appearance after it really started to get noticeable. I considered coloring it in with a brown sharpie, but I knew I probably wouldn’t get the results I wanted as far as color-matching goes. Then I considered painting it with acrylic paint, but was worried it would end up cracking. Ultimately, we chose to live with it until one day the (very prominent) arm of the couch started peeling. I knew at that point there was no living with it any longer.
Guys, I found the BEST solution. Did you know they make leather paint? I had no idea! I couldn’t believe I hadn’t thought of it before, but I’m here to tell you it WORKED. I used the brand Angelus, though I’m sure any leather paint would work.

Here’s what I used:
Angelus Brown & Black Leather Paint (I ended up needing a total of 2oz of brown and 1oz of black)
Any paint brush (will depend on the size of your project)
For around $50, I resurrected my $3,000 couch! Worth. Every. Penny.
I started by peeling off any remaining pieces. This step was both time consuming and oddly satisfying. I personally did this with a glass of wine in hand and Gilmore Girls playing in the background. Whatever you do, DO NOT skip this step. It ensures the paint goes on evenly and looks smooth when you’re done. If you don’t peel the rest of the material off, it will start to peel again down the road.
I wiped it all down with a damp cloth (TIP: Keep this damp cloth around in case you paint anything you didn’t intend to during this process)
I mixed my brown and black paints on a paper plate until I found a color match for my couch. (TIP: Use a large piece of what you peeled off in step 1 to help match your paints. I painted right on the leather piece and watched to see what dried the closest in color. IT WILL CHANGE COLOR WHEN IT DRIES, so make sure to take that into account before starting on your entire couch)
Painted it on. You can be generous with the paint, the material will suck a bit of it up. My project needed a solid 2 coats.
After letting it dry for a day or two, I went over everything with the Acrylic Matte Finisher. It goes on blue-ish, but dries clear. I wouldn’t say it actually leaves a “matte” finish… it’s a bit shiny, but very similar to the look of real leather.
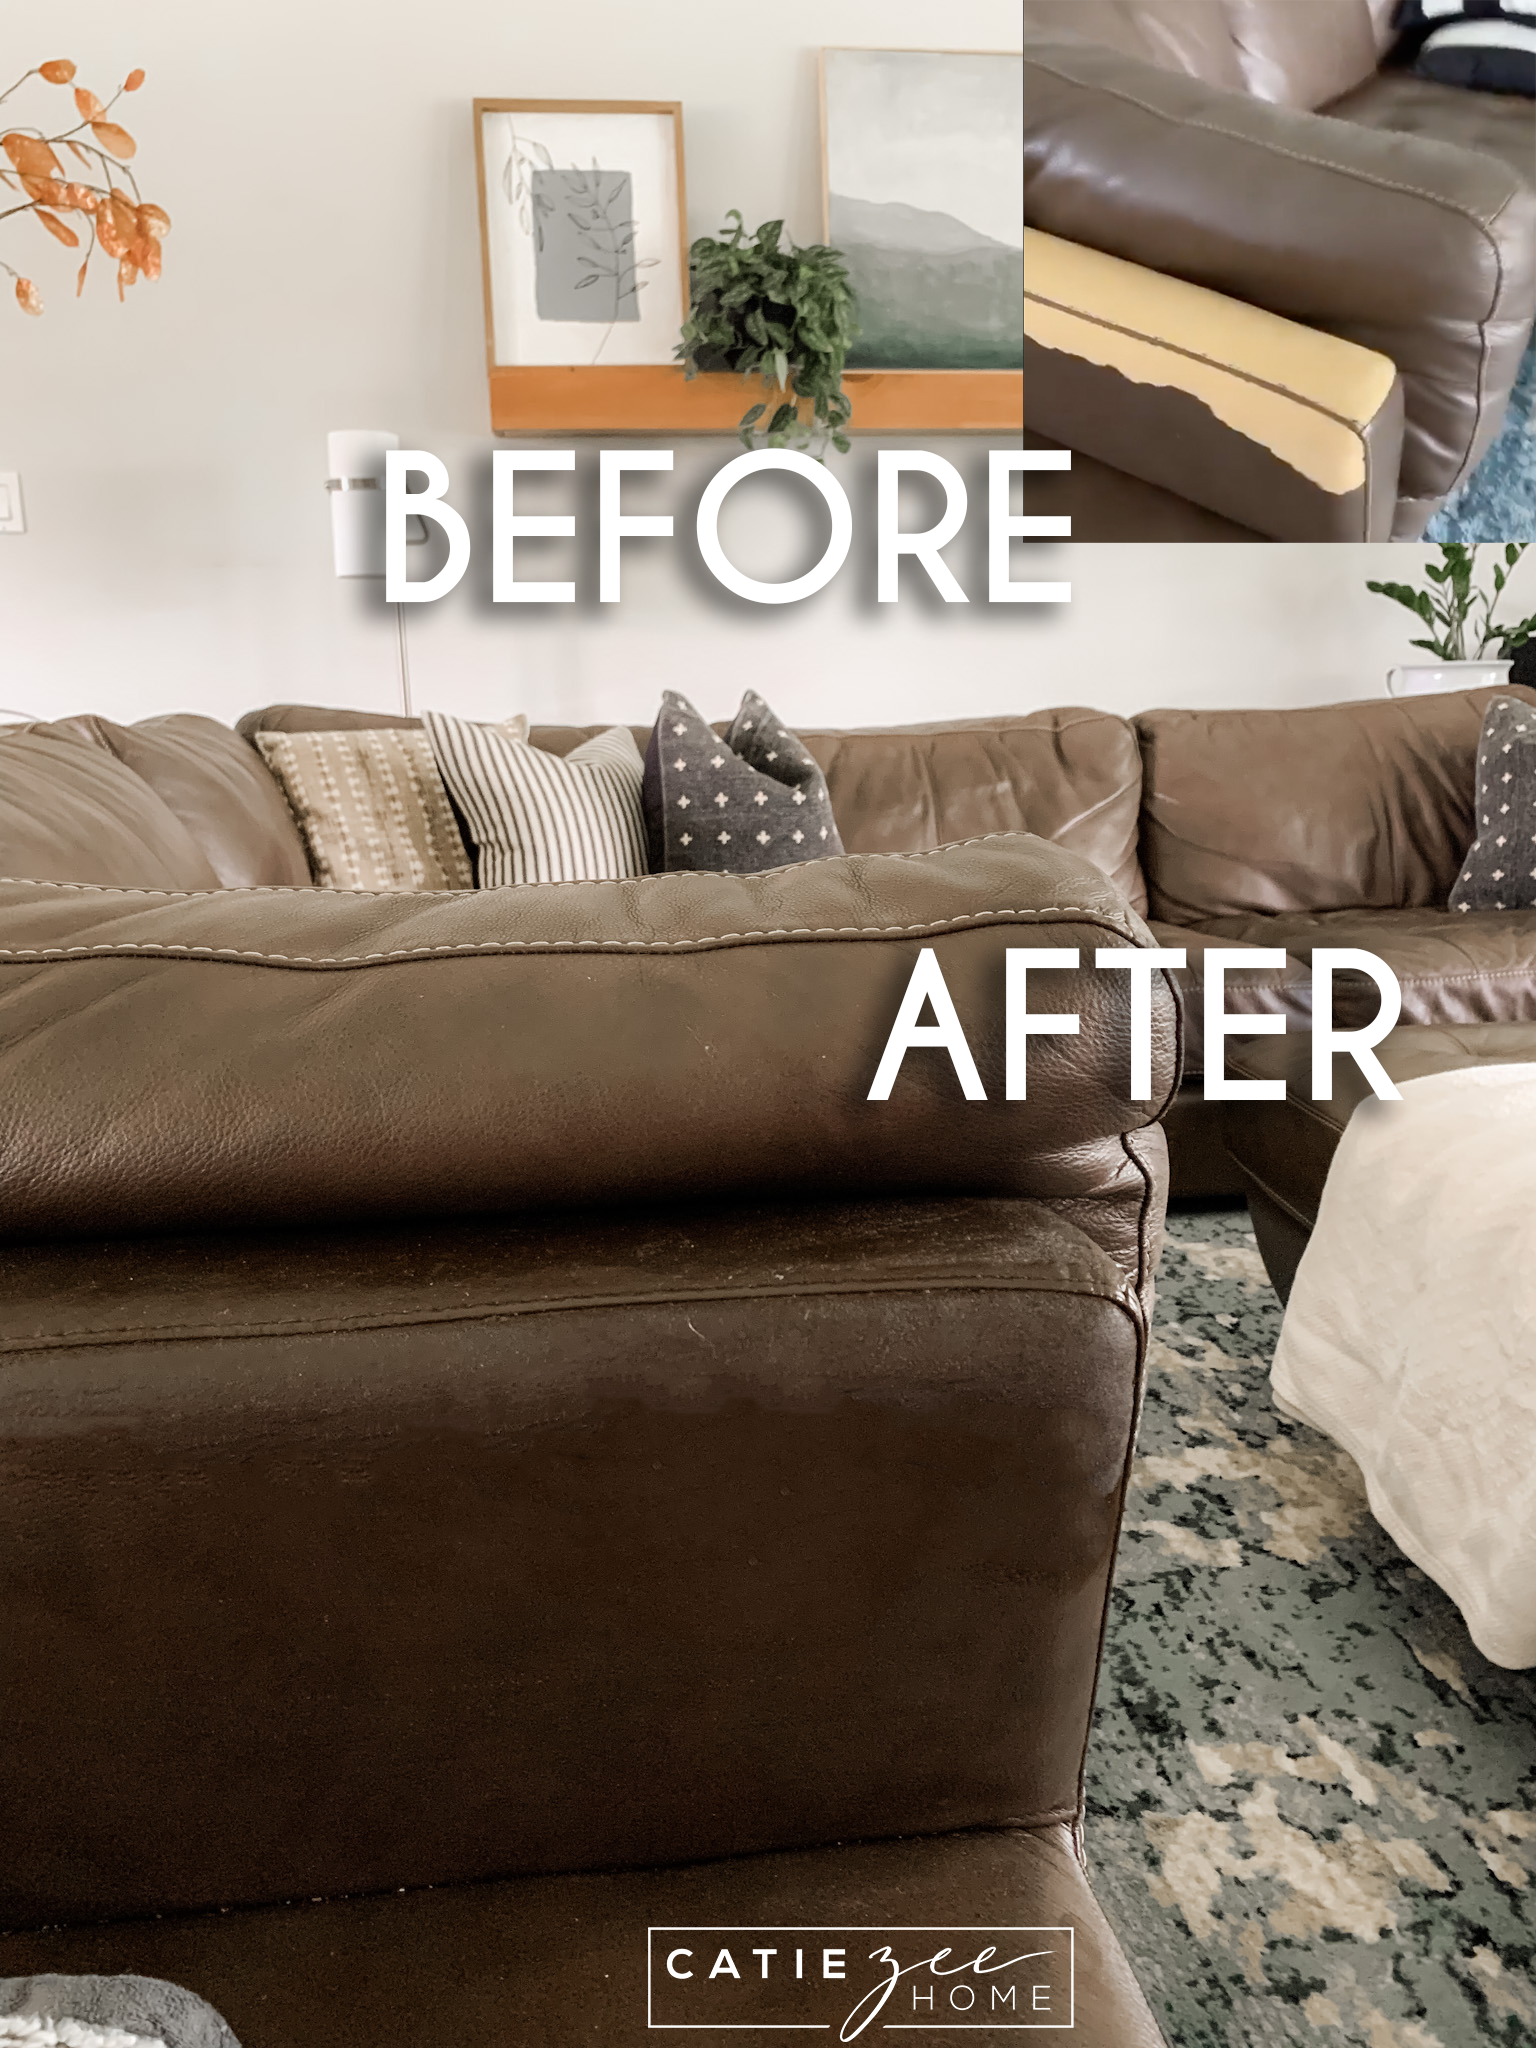
That’s it! Fifty bucks, a few nights drinking wine and binging Gilmore Girls, and we’ve got ourselves a couch that’s good as new! Do you have a leather couch that’s started peeling too? Let me know if you try this to save it! I’d love to see your results.