DIY Kitchen Reveal
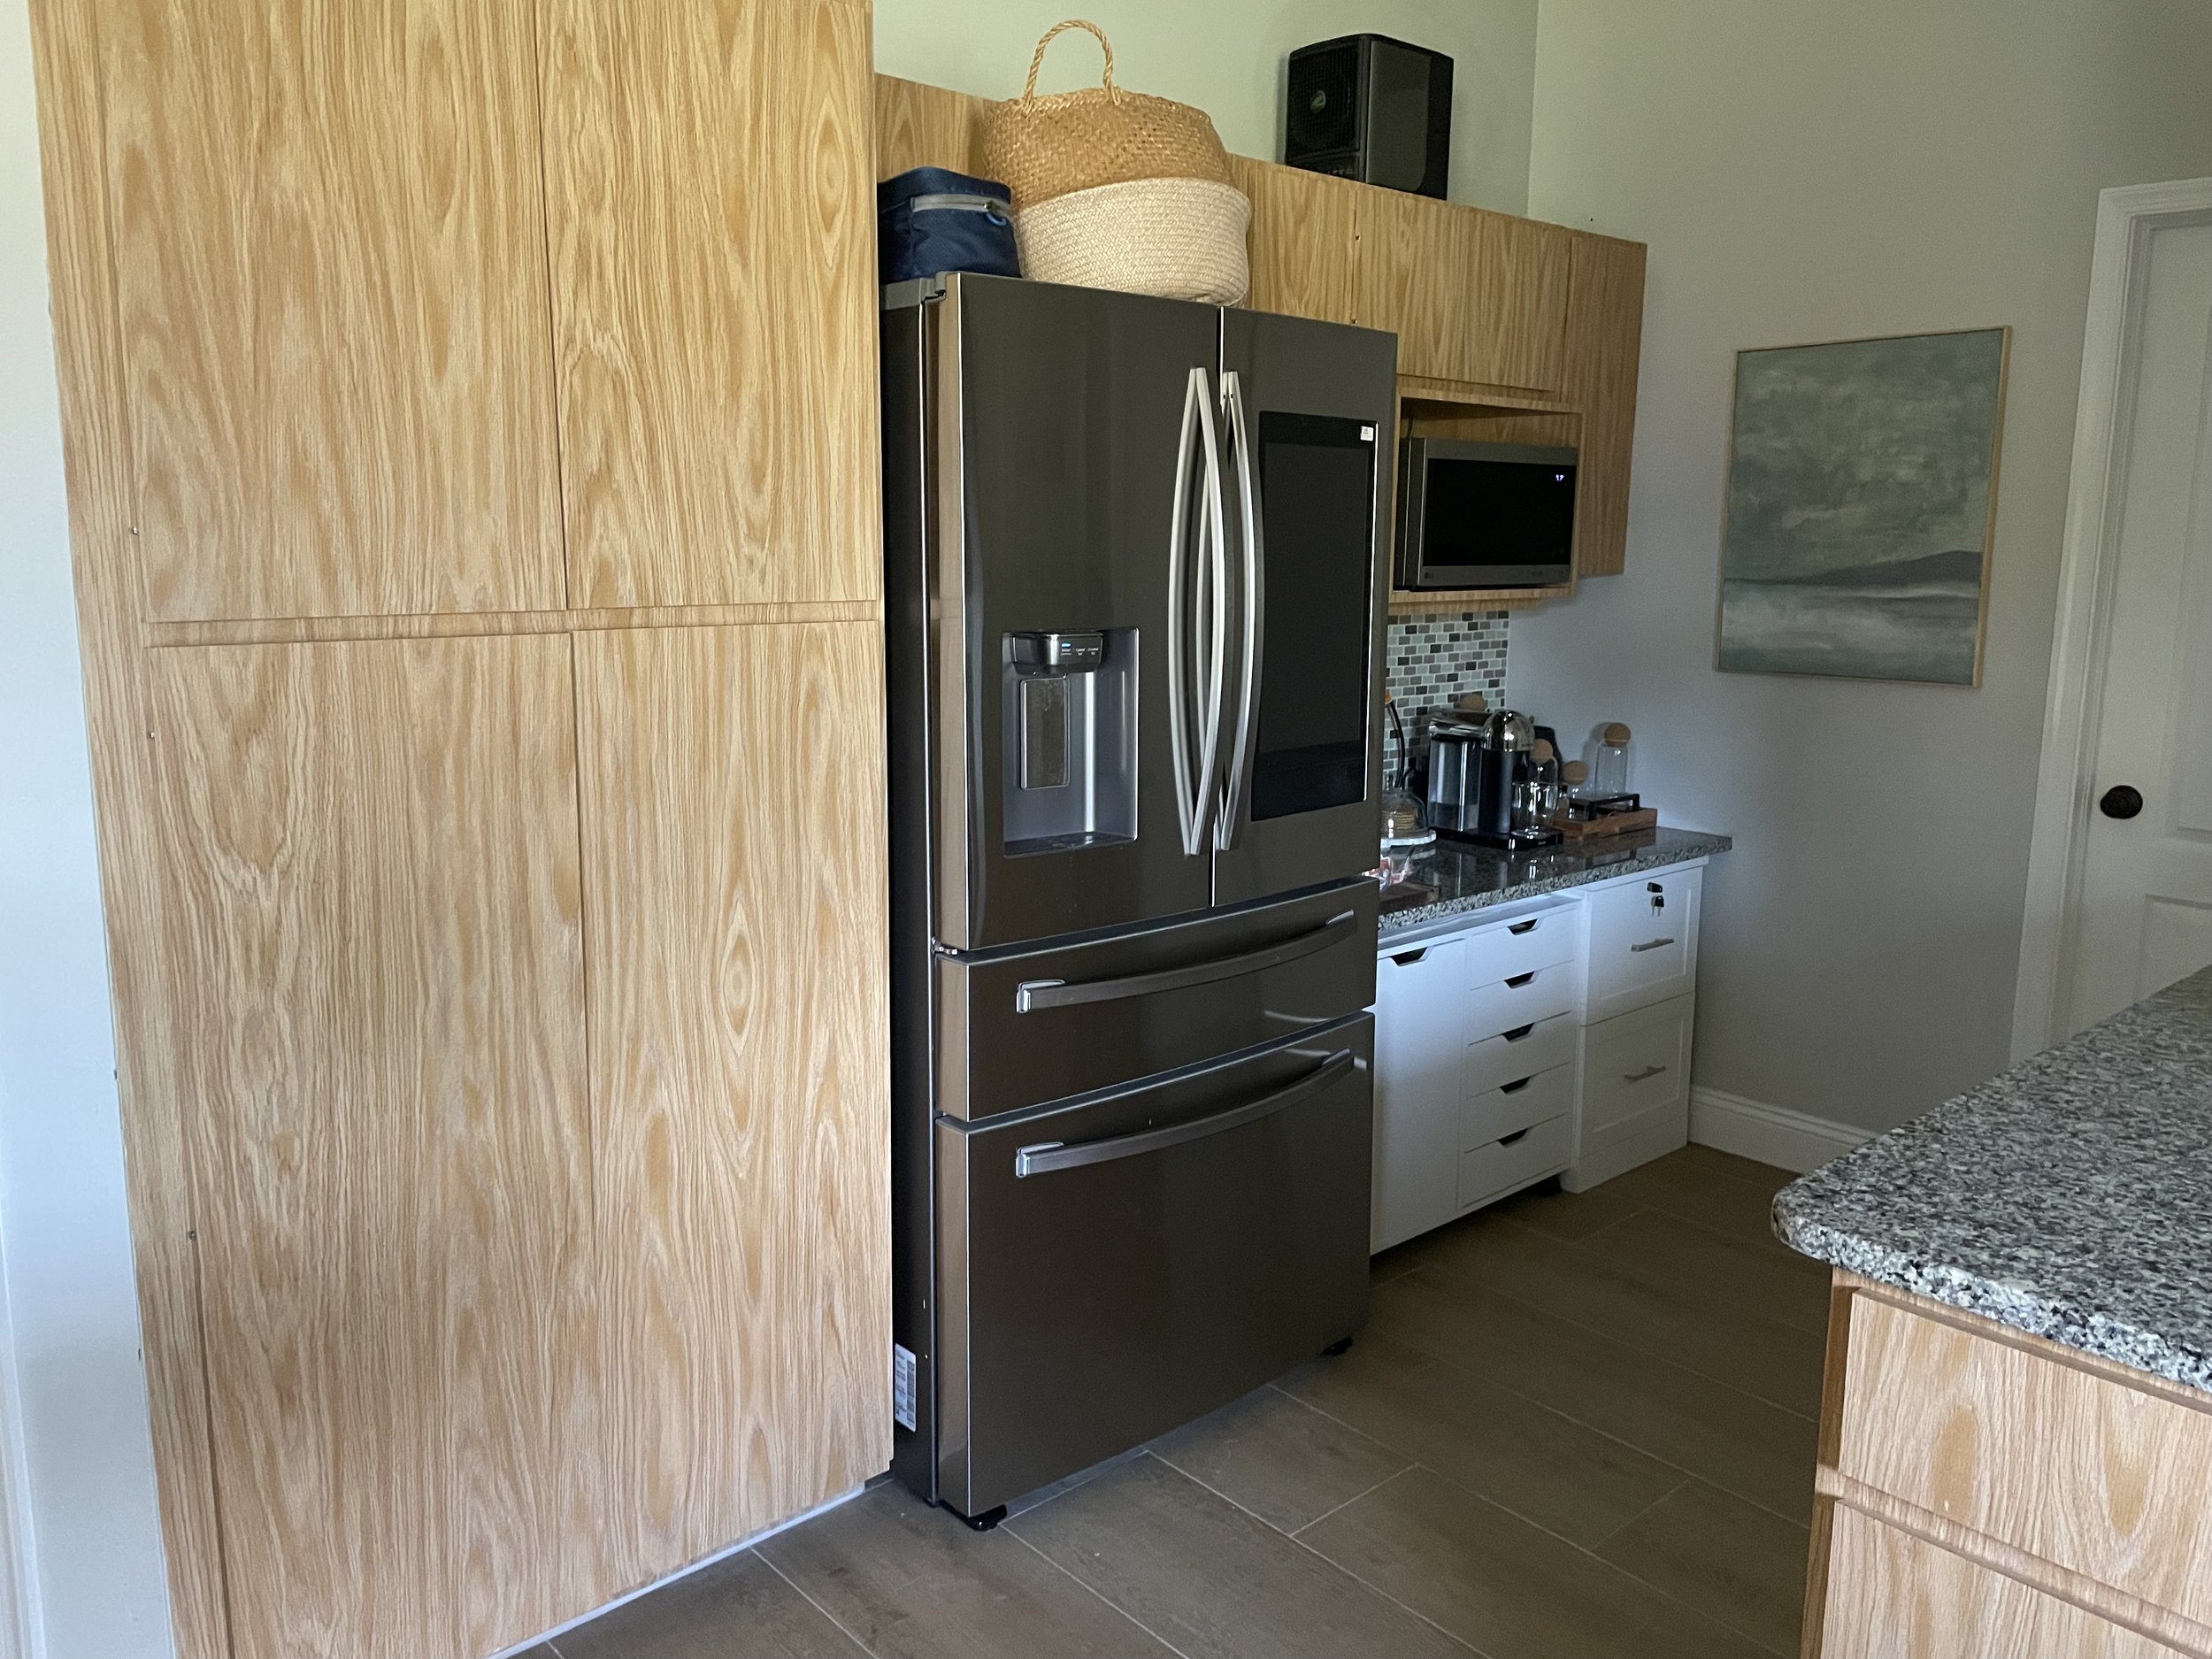
It was no secret that we were looking to buy a bigger house a while back. As a result, we weren’t invested in making any costly updates to the kitchen in our current house. I was never a fan of the dated laminate cabinets and had quickly outgrown the busy glass mosaic tile backsplash we’d installed hastily after moving in (almost 10 years ago!). When the housing market started booming to the point where we could no longer afford to upsize, we agreed it made sense to update our kitchen on a budget. We were going to be here a while and I wanted to finally love my kitchen.
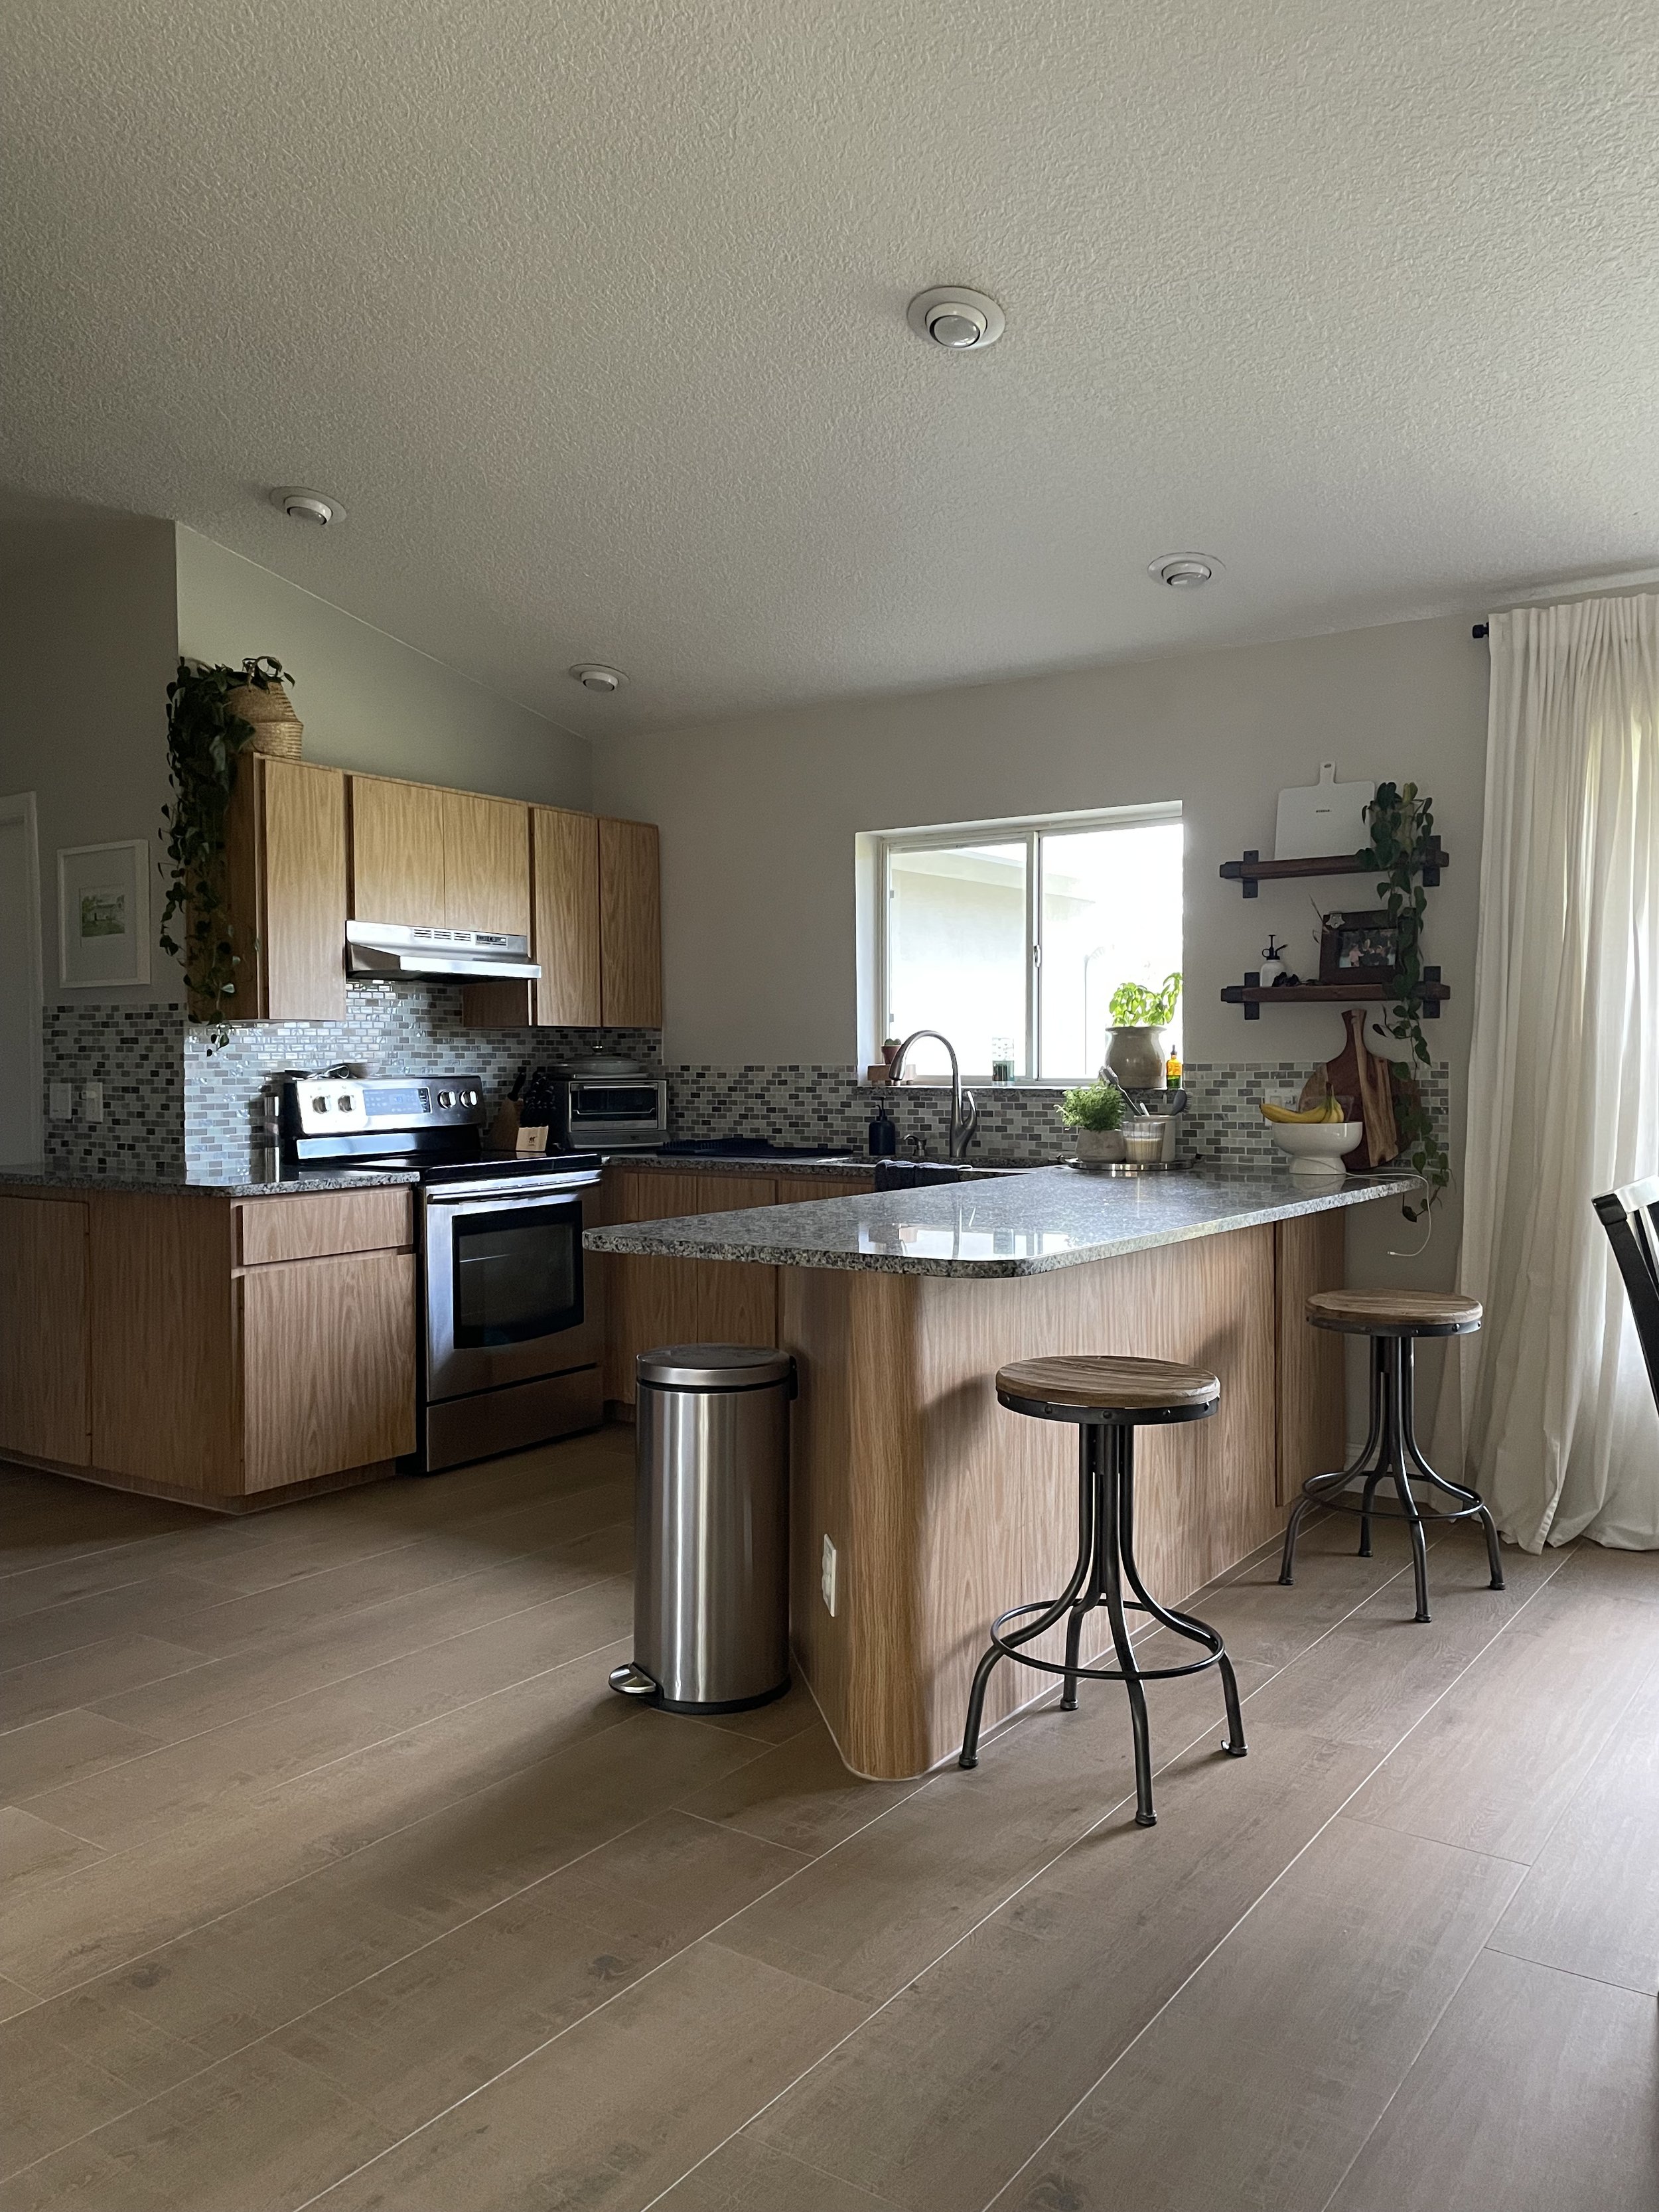

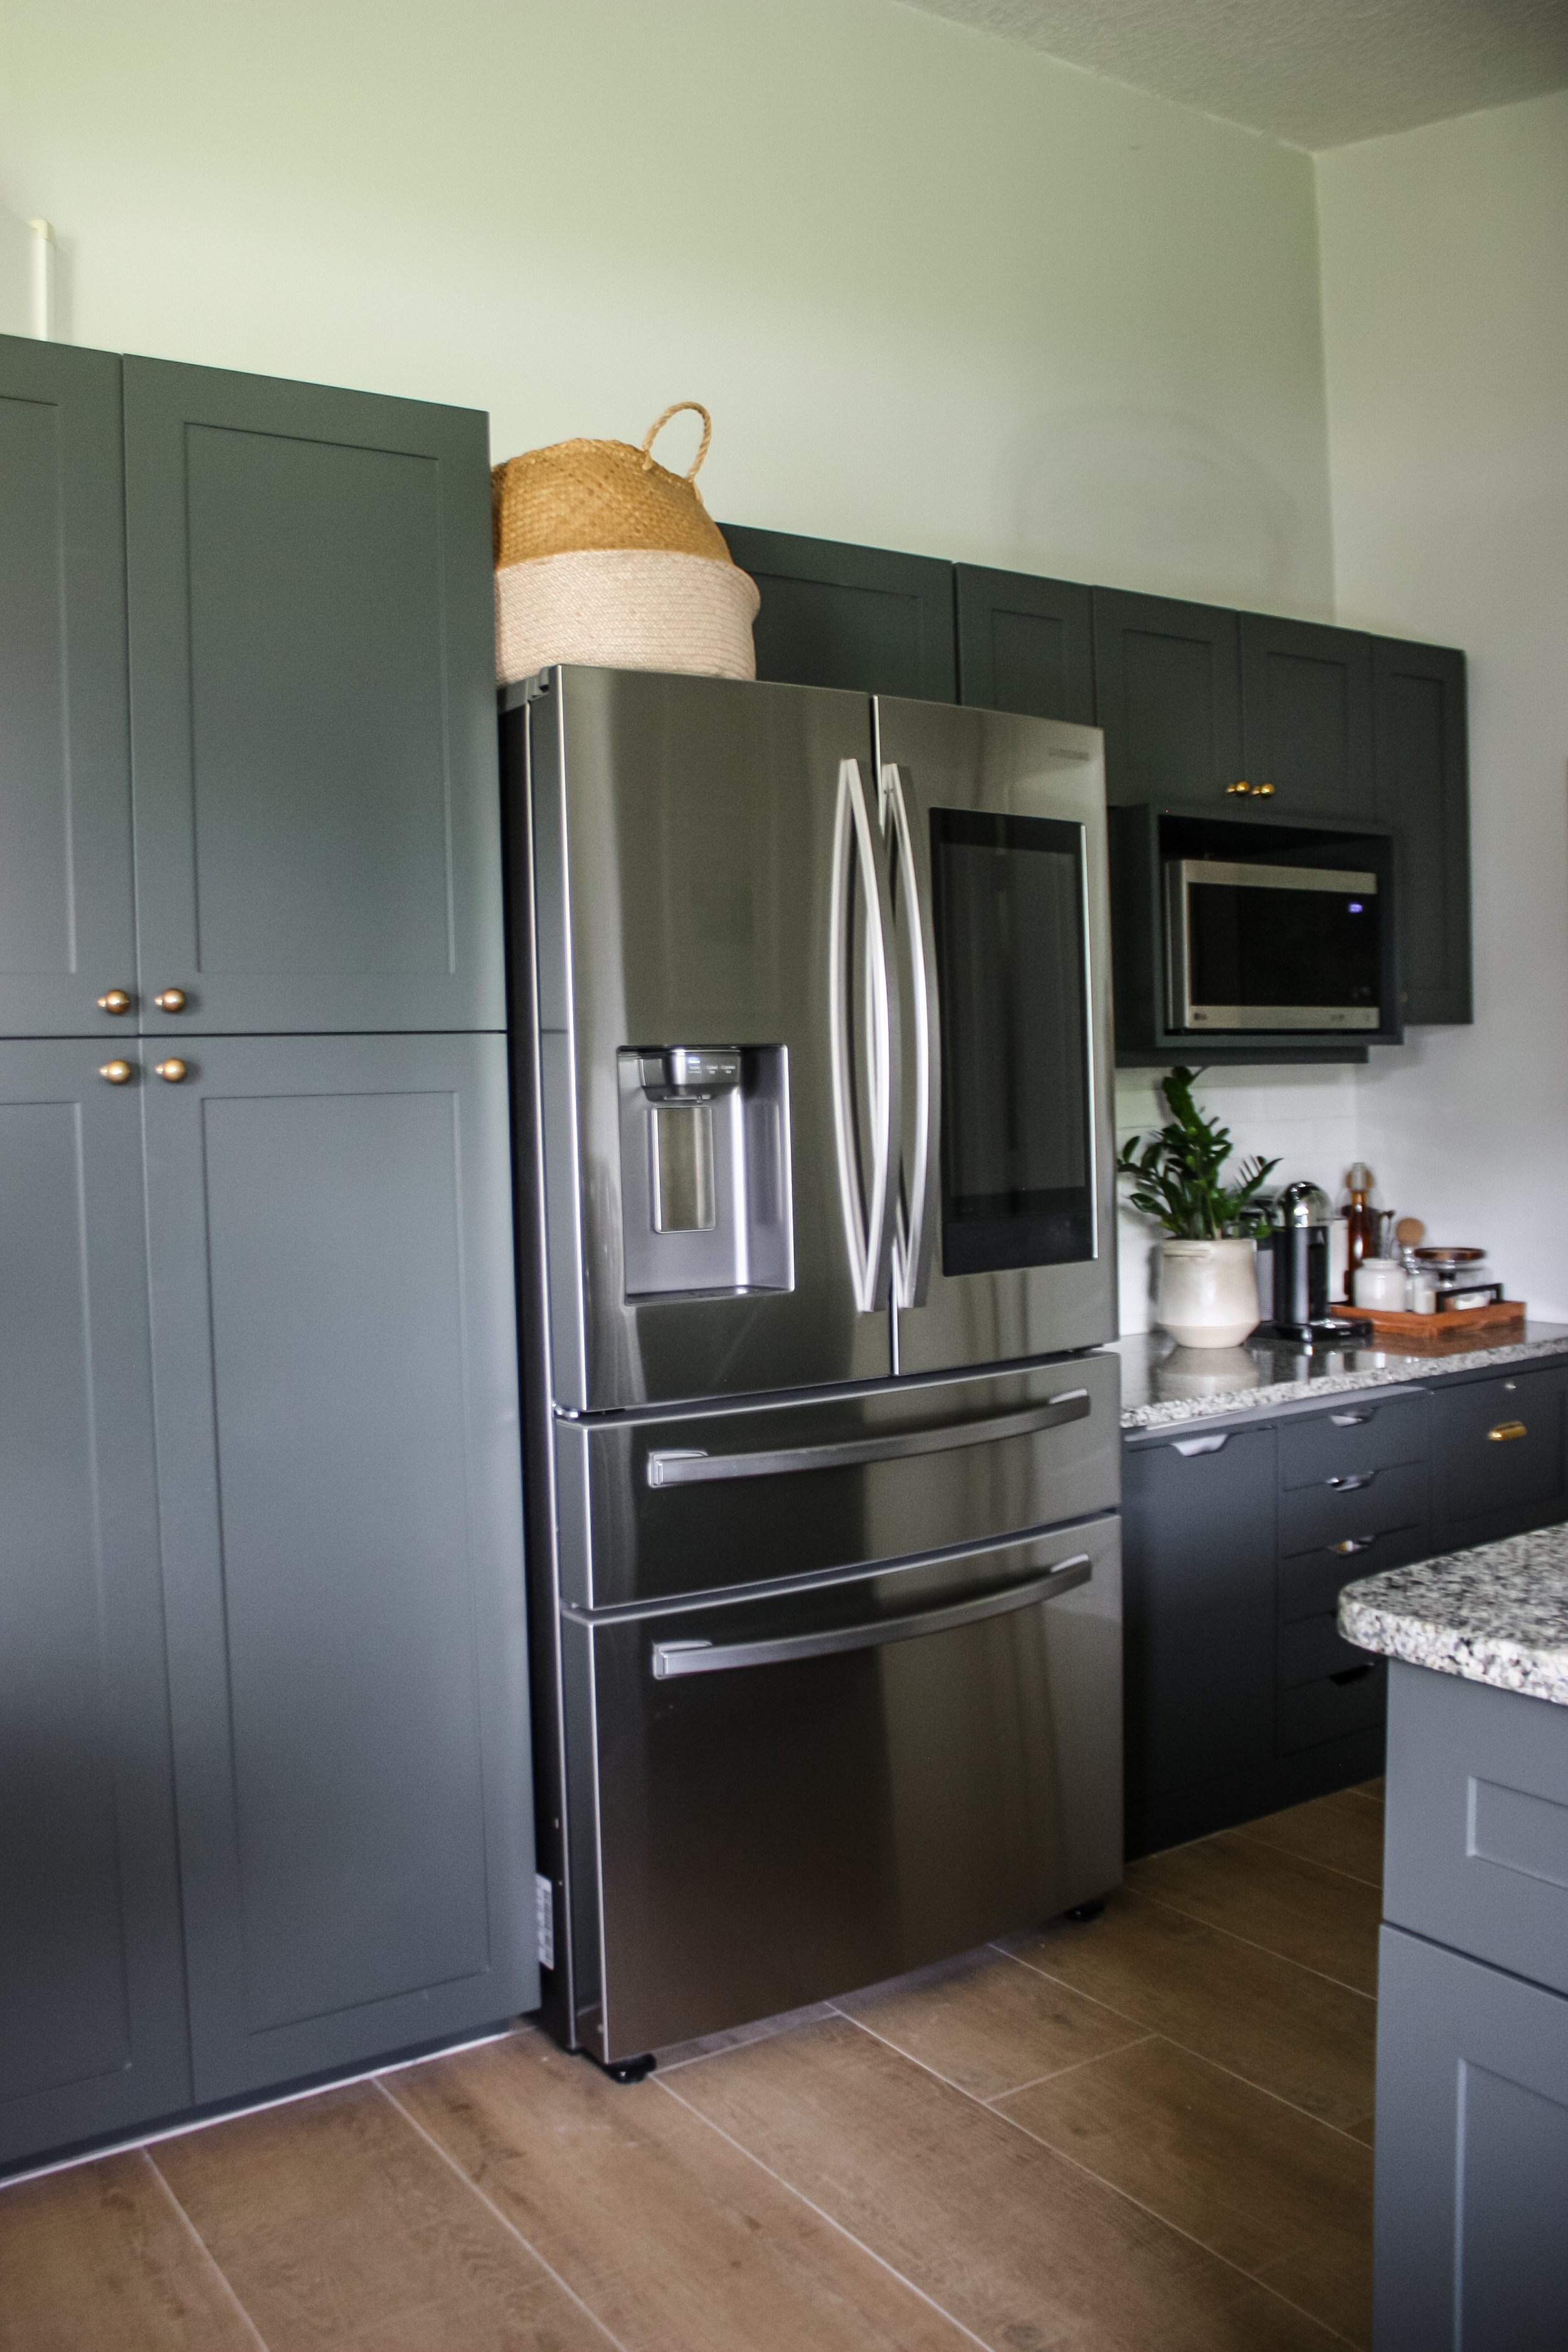
BEFORE AND AFTER BUDGET KITCHEN RENOVATION
In order to save money, we decided to keep our existing cabinets and buy new doors. In doing this, we didn’t have to buy new countertops, a new sink, or new cabinet boxes. Are the countertops exactly what I would’ve chosen today? No, but I could make them work.
We’ve always loved the layout of our kitchen, so it made sense to maintain the functionality of it and give it a face lift as opposed to gutting the entire thing (and then living without a kitchen for months… not something I was up for).

ORDERING NEW CABINET DOORS
The first step we took towards our new kitchen was ordering custom cabinet doors from Nieu Cabinet Doors. I drew up a few rough sketches of each wall of cabinets and Joe helped me carefully measure according to the directions Nieu Cabinets provided on their website. Note that Joe measured for these cabinet doors - math is not my thing. I liked the fact that we could order the doors painted, which made a huge difference in the end result because we were able to achieve that “factory finish”.
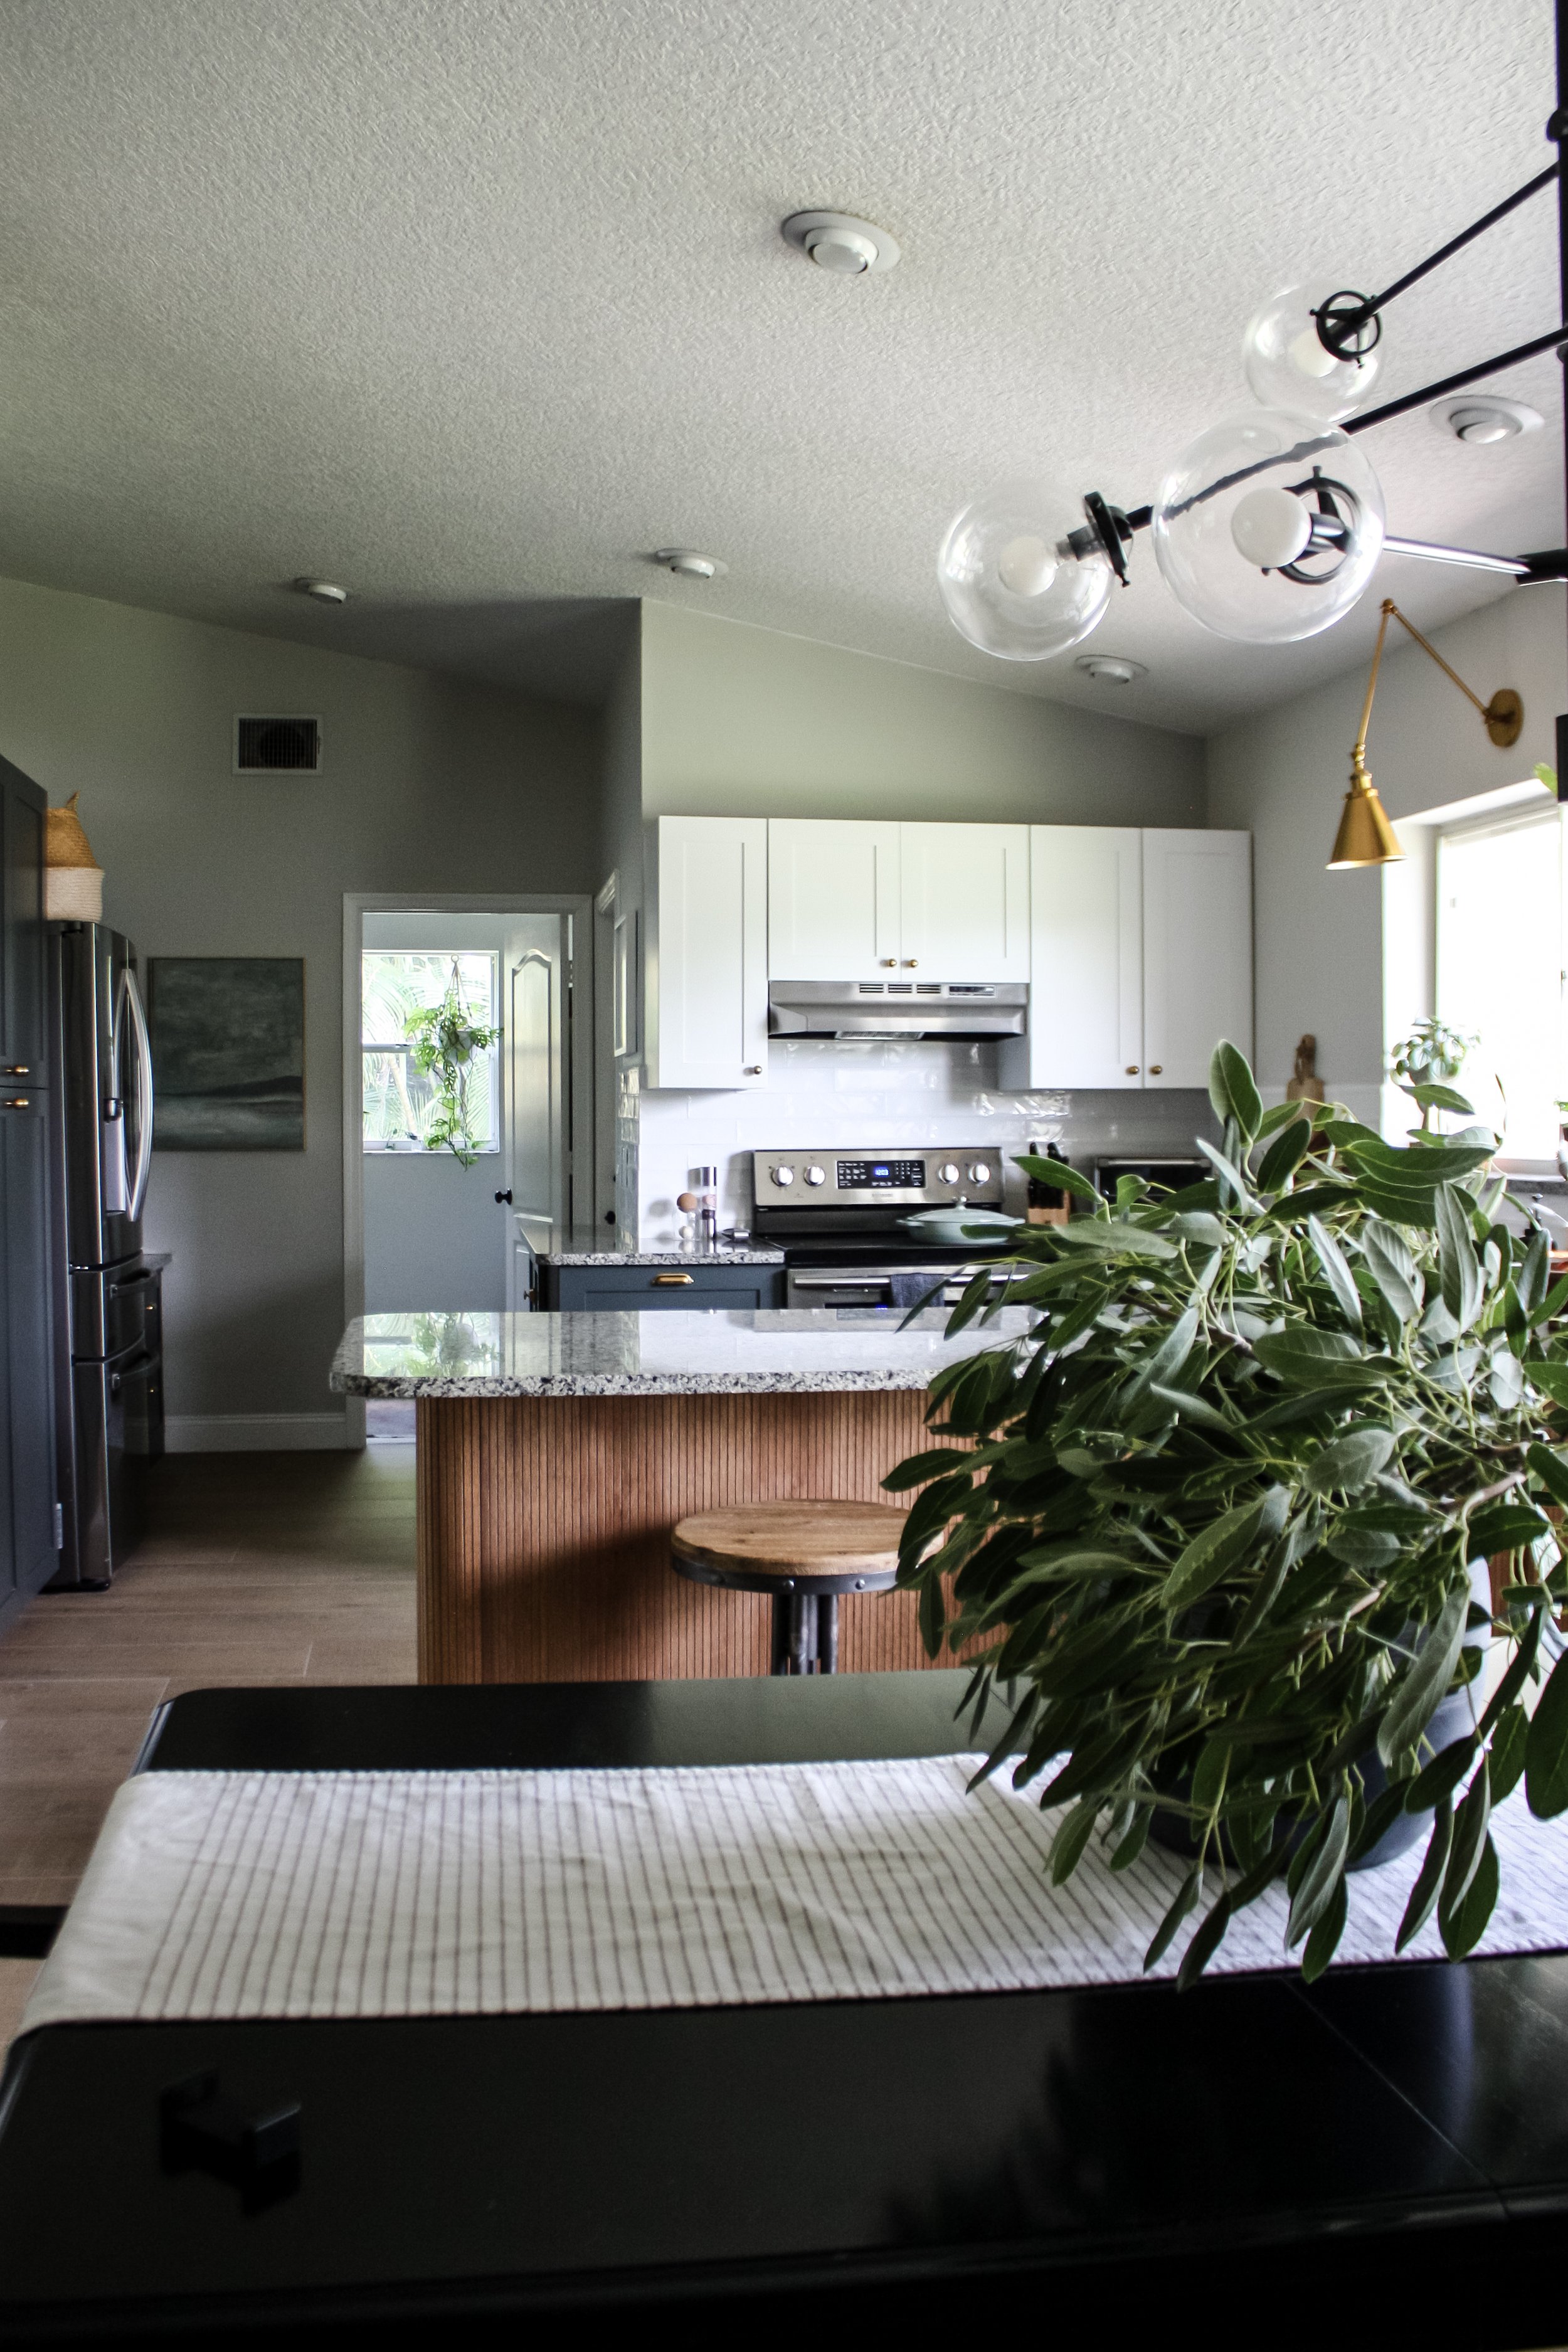
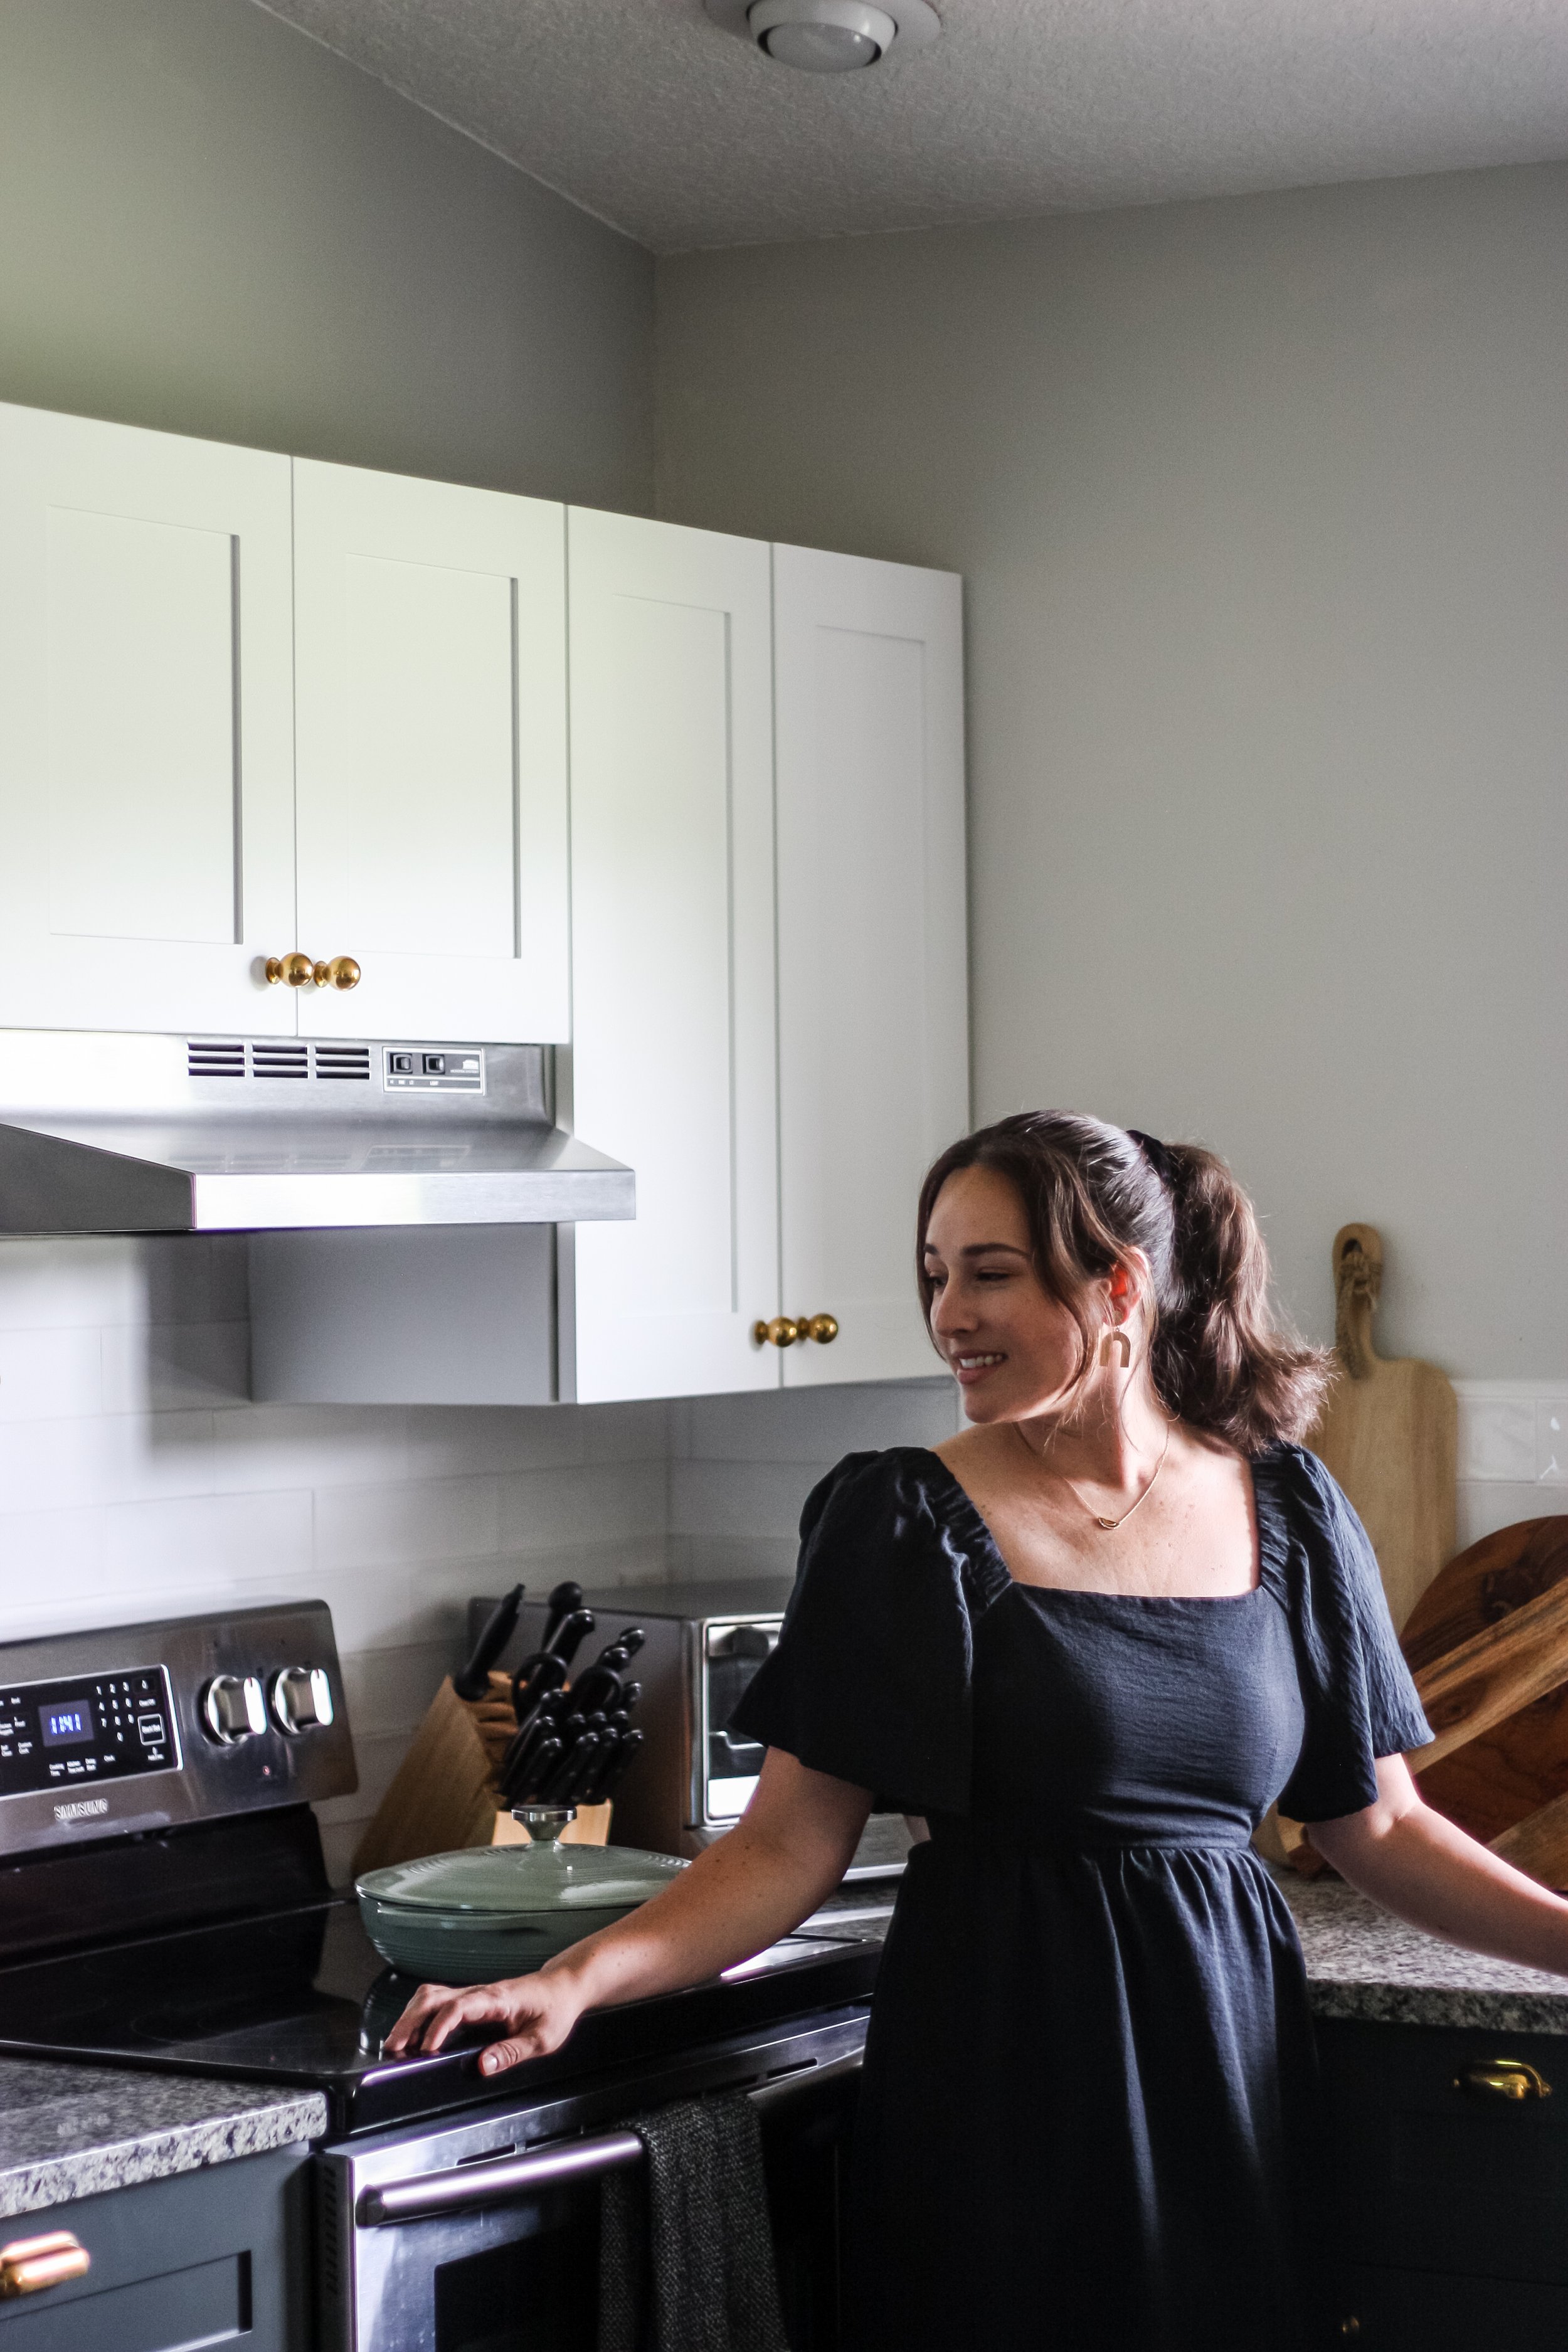
Nieu uses Sherwin Williams colors for their doors, so we were able to choose the exact same paint colors for our cabinet boxes. We went with SW Extra White (Winter White on Nieu’s website) for the uppers and SW Rock Bottom (Dream Dusk on Nieu’s website) for the rest.
The doors took about 10 weeks to arrive, so we made use of that time by checking off the rest of our to-do list.

DIY BACKSPLASH
The biggest reason our countertop wasn’t working in the ‘old’ kitchen is because it was a busy granite paired with a busy glass mosaic backsplash. In order to calm the space down visually, the backsplash needed to go. I used a chisel and hammer to remove the glass tile (This was a very messy job. Use protective eyewear, trust me) and then rented a wet saw from Home Depot to install the new tile. I used this tile adhesive and this grout in the color Arctic White. The white artisan subway tile is a much more classic choice and adds great texture.
DIY PAINTING LAMINATE CABINETS
I did some research before deciding to re-face our cabinets in leu of replacing them, and I was surprised to find a shortage of information on successfully painting laminate cabinets. Here’s what I learned - laminate does not hold onto paint like wood does, so you need a bonding primer that will hold onto the paint. These are the steps I took to prep the laminate for paint:
Removed the existing doors
Sanded the entire surface
Cleaned the surface with TSP to remove any grease or residue
Primed with Zinsser bonding primer
I let the primer dry a full 24 hours before painting with a cabinet enamel in a satin finish. I highly recommend a satin finish instead of high gloss. You will end up with a much cleaner finish that doesn't show every imperfection in the surface you’re painting. I was really happy with the smooth finish I was able to achieve with this particular paint! I applied it with a foam roller, which worked great. Make sure to let it dry the full amount of time listed on the can before you begin attaching your doors - we waited a full week to make sure it had cured.

DIY KITCHEN PENINSULA
Our peninsula is curved. This was a bold choice in the 90’s and it’s a bold choice today. After years of trying to figure out how to square it off, I have decided to embrace it as a feature. It’s kind of cool and curves are back, baby! That said, my kids sit at our counter and kick the peninsula constantly so I didn’t feel comfortable simply painting the laminate there.
I decided to cover the peninsula in pole wrap, but to my dismay, my orders were cancelled multiple times citing stock issues. After waiting a few months for it to come back in stock, I found an alternative! I ended up ordering these Wood Tambour Doors, and while pricier than pole wrap, they were so beautiful I decided to stain them instead of paint them as originally planned. I mixed Varathane’s Early American and Special Walnut to keep the wood tone warm and give the peninsula some much needed contrast with our floors.

SPLURGE AND SAVE KITCHEN ACCESSORIES
When I was designing this kitchen, I knew from the beginning that I wanted unlaquered brass knobs and pulls from Rejuvenation against the rich dark green cabinets. I also used a few latches on the cabinets we don’t use as frequently. They were definitely a splurge (Joe still doesn’t actually know what we paid for them) but we touch them every day and they make me so happy. Hardware is jewelry for your kitchen!
To bring another brass element into the kitchen, I also hired an electrician to install this budget friendly wall sconce above the window. It was bigger than I expected for a $40 fixture and it is gorgeous.
DIY CABINETS USING OFFICE FURNITURE
While we didn’t buy new cabinets, we did modify some office furniture to serve as cabinetry. We have a small desk area in the corner of our kitchen with open space beneath. I assume this was to accommodate a chair if you actually wanted to sit in your kitchen and work, but laptops exist and I needed more storage, so I bought a filing cabinet and halifax storage cabinet that were roughly the same height to fit under the countertop.
We built a base for the halifax cabinet to replace the casters and raise it up to match up with the bottom of the filing cabinet and painted it SW Rock Bottom. I also replaced the hardware on the filing cabinet with the same brass pulls in the rest of the kitchen. Guys - they look like they were always there and only cost a total of $300. The small drawers in the halifax cabinet are perfect for coffee bar supplies, teas, wine accessories, etc.
While I’m calling this kitchen renovation finished, we do have one more project waiting to be tackled. I will be replacing the laundry room door with a wooden french door to allow more light to enter that corner of the kitchen.

BUDGET KITCHEN COST BREAK DOWN
Here’s what we ultimately spent to transform our kitchen. We easily saved 50% of what a new kitchen would have cost us. The grand total was only $6,200!
Cabinet doors - $3,702
Cabinet paint - $120
Cabinet Hardware - $384
Wall Sconce - $40
Electrical for sconce - $225
Wood Tambour Doors - $800
Backsplash Tile and Grout - $500
Glass Panel Laundry Room Door - $230
Additional base cabinets - $300
Follow me on Instagram